A photo is worth 1,000 words, so wouldn’t you want your home printed photos to stand out? High-quality photo printing is among the top reasons to buy a top of the line home printer, but you don’t need the fanciest equipment on the market to get great results. There’s a lot of technology and science which goes into creating the perfect, crystal clear print. From paper type, to printer settings, and even editing software, there are a lot of steps in printing gorgeous photos at home. Fortunately, we’ve got the guide on what you need to do when printing photos that stand out!
High-quality printed photos need digital adjustments before printing
When you’re printing photos at home, there are a few things you need to do before actually clicking ‘print’. As nearly everyone on social media can attest, editing photos even a little can make them more attractive. There’s a wide variety of photo editing software available, such as Adobe Illustrator and Photoshop. Each has its own benefits and work equally well. The important thing to remember, regardless of which software you use, is to always calibrate your screen. Computer screens are bright by default, which can alter the way your eyes perceive color. When you’re looking at a screen, hues will typically appear much brighter than when you print out the picture. This can be frustrating, but you can adjust your screen to display exact colors with the help of a device or piece of hardware designed to tweak the settings. Once you’ve got the colors down and looking just as you intended, export the photo to a non-compressed format, such as a .PSD or .TIFF. The traditional file format, .JPEG, compresses the photo and loses details. It’s not bad if that’s all you have to work with but shoot for a higher resolution file if you can.
Paper type matters more than you think when it comes to photo printing
You’ve got a beautiful photo with colors you love and are ready to print it! But wait… What kind of paper do you have loaded? Printer paper is as varied as printers themselves, and what you put into your machine can make a huge difference for the final product. For photos, you always want to opt for a thicker, cardstock-like paper. The heavier weight will not only give your photo a high-end look but will give something for the ink to ‘grip’ to. Due to the amount of pigment being printed onto the page from a photo, lighter papers may snag or bleed more than heavier stocks. From there, you can choose either glossy or matte. Matte paper is a great option for nature or landscape pictures, as it’s dulled finish gives the image a natural look. Gloss paper types are ideal for realistic photos where you ideally want the subject to come to life. Don’t be afraid to play around, and make sure whatever paper type you choose fits your printer specifications!
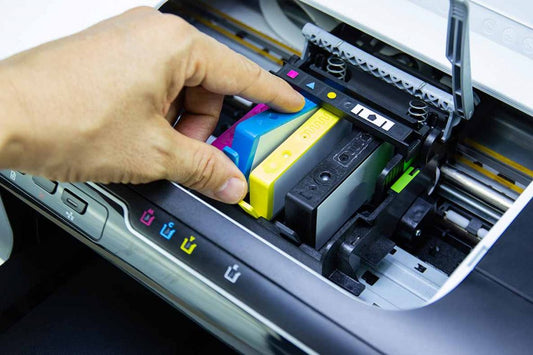
Inkjet or laser: the age-old printing question
So, the paper is bought, and the picture is ready: what now? The only thing left to do is choose what kind of printer you want! There are benefits to both inkjet and laser printers, and each has its own unique advantage for photo printing. Inkjet, as the name implies, uses actual ink to lay on top of the paper. They’re unique in their ability to create a broad spectrum of colors, and they’re an ideal choice for high-quality photo printing. The downside is they can be more expensive than laser, which uses four different colored cartridges to lay down color. Laser printers have a higher capacity, so they’re a great option for a budding photographer looking to sell multiple prints. Their disadvantage is, while cheaper, they’re not quite as accurate. They might not reproduce colors perfectly, and typically do not have the same overall quality print. Each printer type has its role, so don’t be shy about asking your local print supply company what they recommend! For any questions, give Vegas Ink and Toner a call at 702-850-7703!